So you've got a misbehaving function in your Node app, and you need to debug it. How can you get more logging? It would be great if you could add log lines to your function, but only output them when you need them so you don't create a bunch of noise & expense. You can do this with dynamic logging for Node.
Let's see how to enable logging for:
- A single function
- A particular user
- For just 1 hour
The Code We Want To Debug
Here's a really basic skeleton of an Express app. It's has a simple route that takes a user id from the url and returns some data from the database. Let's pretend it's misbehaving and we need to debug it.
We've added two console.log statements, but this probably isn't shippable as is because, at high throughput, we're going to print out way too much logging.
app.get("/users/:id", (req, res) => {
  const userId = req.params.id;

  var sql = "SELECT * FROM users WHERE id = $1";
  console.log(`running the following SQL ${sql}`, { userId: userId });

  db.run(sql, [userId], (err, rows) => {
    if (err) {
      // ...
    }

    console.log("query returned", { rows: rows });
    res.send(`200 Okey-dokey`);
  });
});
Add & Initialize Quonfig
The first thing we're going to do is add Quonfig. We'll use the standard Node server side client. This gives us an SSE connection to the API out-of-the-box so we'll get instant updates when we change our log levels.
const { Quonfig } = require("@quonfig/node");

const quonfig = new Quonfig({
  apiKey: process.env.QUONFIG_API_KEY,
  defaultLogLevel: "warn",
});

// ... later in our file
await quonfig.init();
Swap Logging to Quonfig
Rather than use a console.log we will create a logger with the name express.example.app.users-path and the default level of warn so we don't get too much output.
We can replace our console.log with some logger.debug and logger.info and now it's safe to deploy. They won't emit logs until we turn them on.
const logger = quonfig.logger("express.example.app.users-path", "warn");

// simple info logging
logger.info(`getting results for ${userId}`);

var sql = "SELECT * FROM table WHERE user_id = $1";

// more detailed debug logging
logger.debug(`running the following SQL ${sql} for ${userId}`);

db.run(sql, [userId], function (err, rows) {
  logger.debug("query returned", { rows: rows });
  res.send(`200 Okey-dokey`);
});
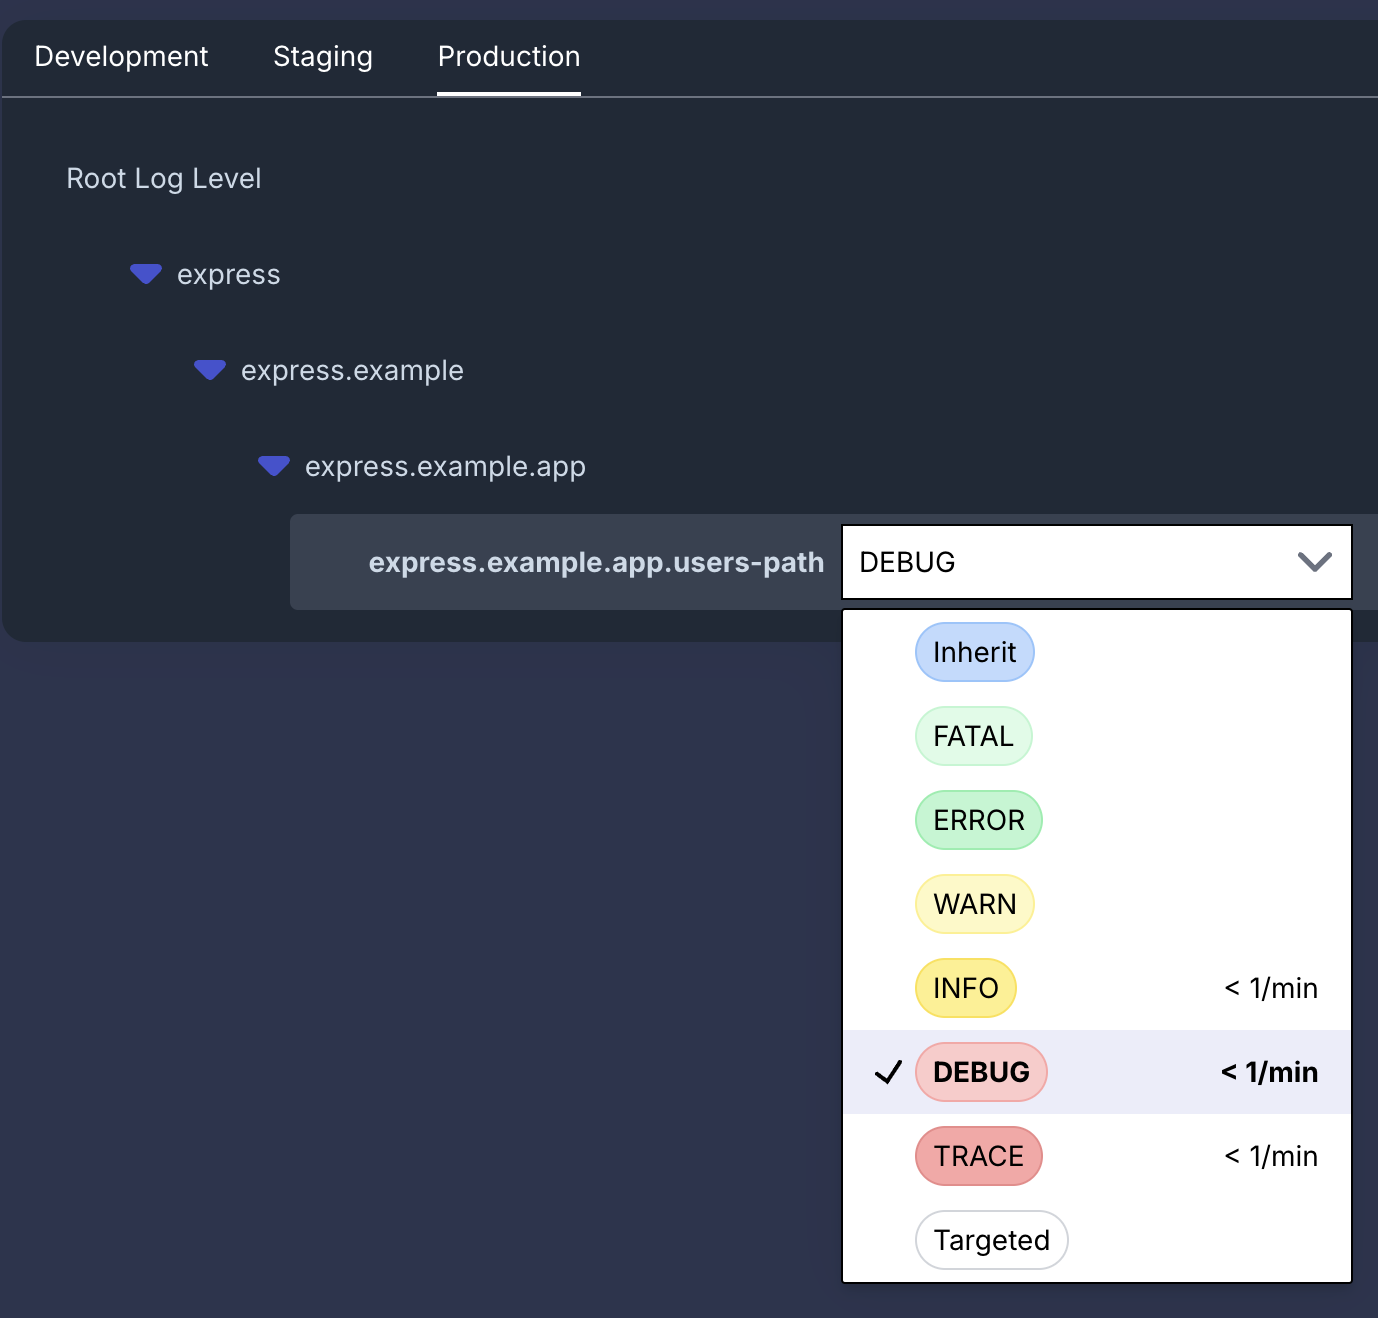
Listen for changes and Turn On Debugging in the UI
We can now toggle logging in the Quonfig UI! Just choose express.example.app.users-path, change it to debug and a minute later you'll see the debug output in your logs.
Adding Per User Targeting
To add per user targeting, we need to set some context so it can evaluate the rules. We should move the logger creation inside this context so that the logger knows about the user id.
// take the context from our url /users/123 and give it as context
const context = { user: { key: userId } };

// wrap our code in this context
quonfig.inContext(context, (quonfig) => {
  const logger = quonfig.logger("express.example.app.users-path", "warn");

  logger.info(`getting results for ${userId}`);

  var sql = "SELECT * FROM table WHERE user_id = $1";

  // more detailed debug logging
  logger.debug(`running the following SQL ${sql} for ${userId}`);

  db.run(sql, [userId], function (err, rows) {
    logger.debug("query returned", { rows: rows });
    return res.send(`200 Okey-dokey`);
  });
});
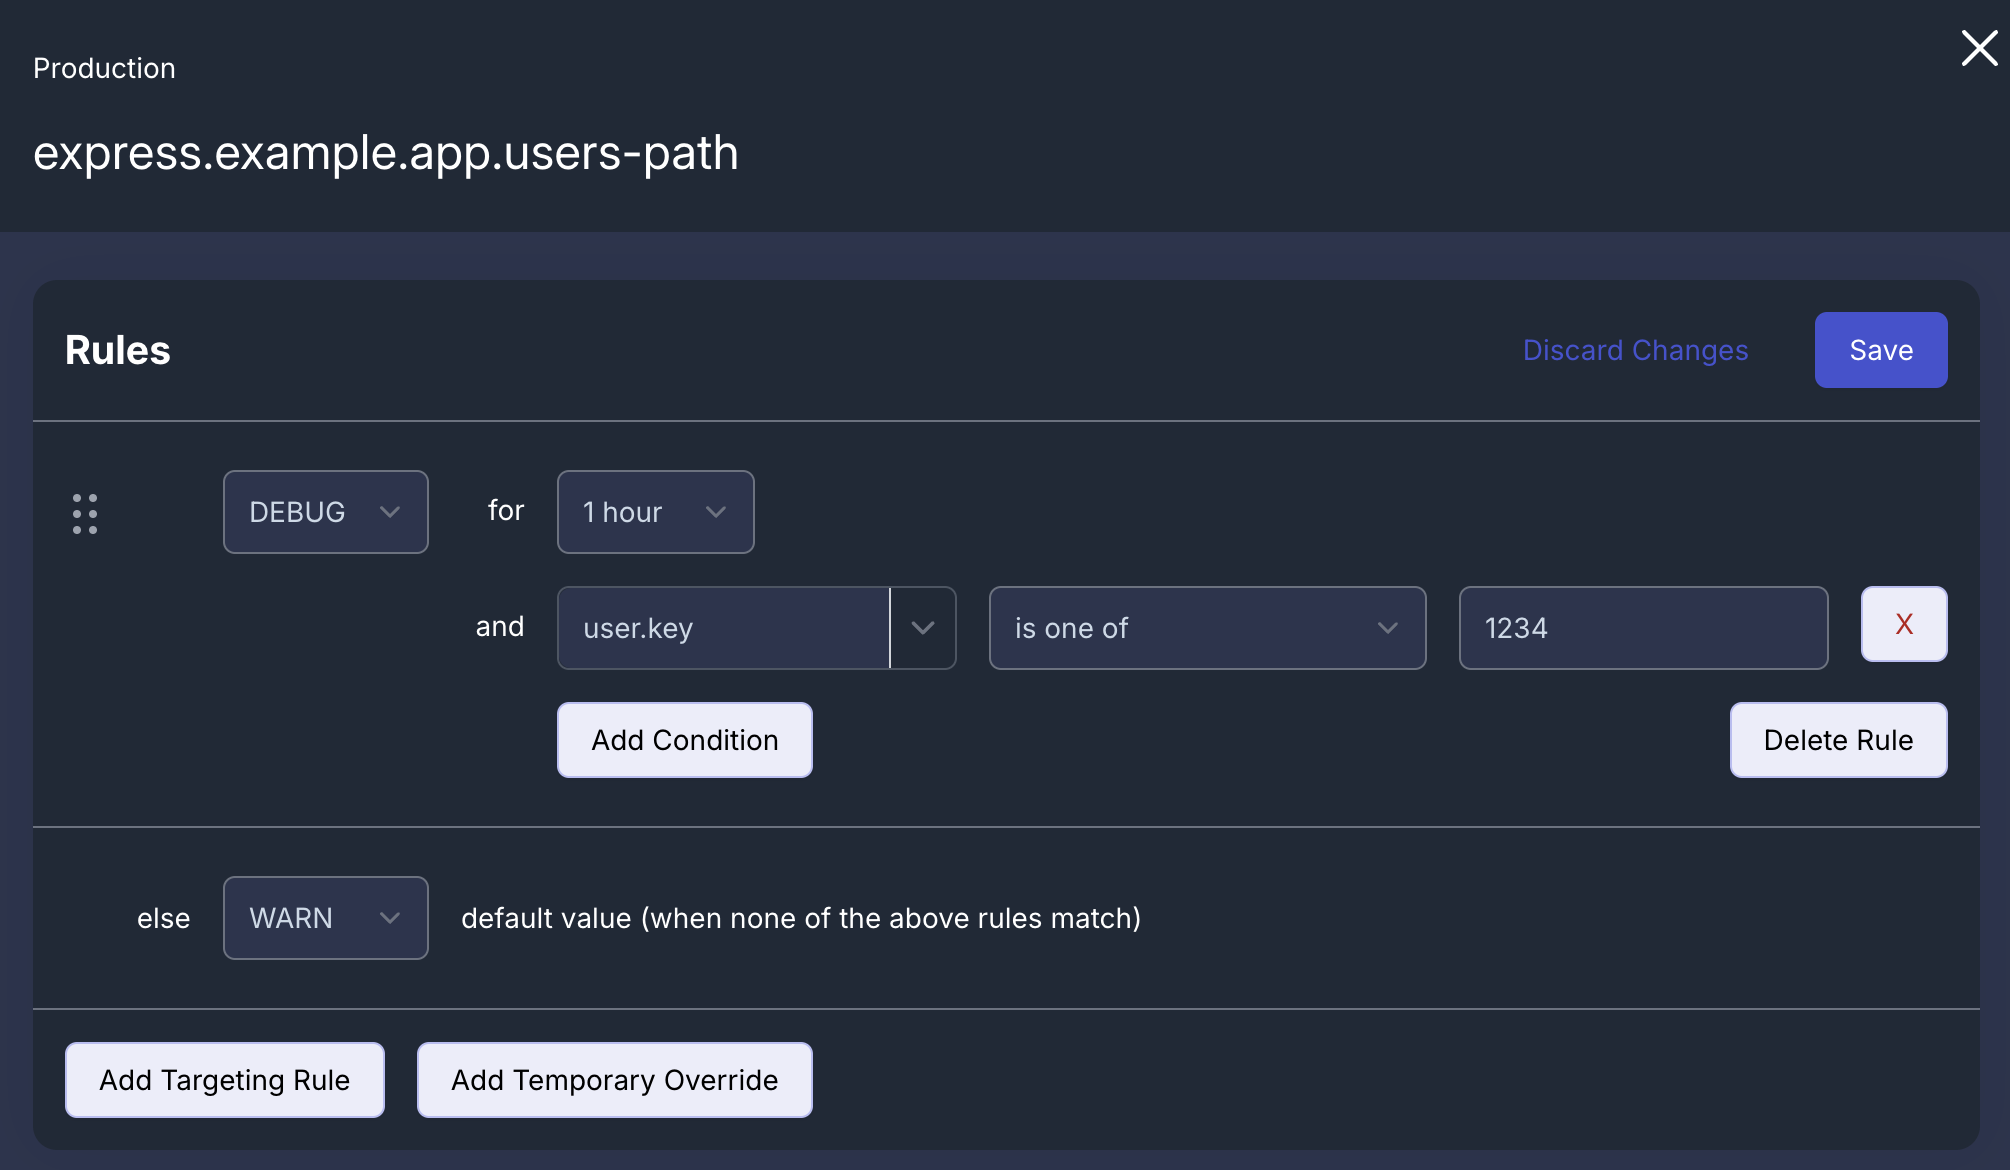
We can now create the rules in the Quonfig UI for just 1 hour and just user 1234. This will let us see the debug output for just that user and automatically stop debug logging after the hour is up.
That's It!
If we load the pages /users/1000, /users/1001 and /users/1234 we'll see the following output in our logs. We have INFO level logging for the first two, but DEBUG level logging for the last one because it matches our user.key rule.
INFO  express.example.app.users-path: getting results for 1000
INFO  express.example.app.users-path: getting results for 1001
INFO  express.example.app.users-path: getting results for 1234
DEBUG express.example.app.users-path: running the following SQL SELECT * FROM table WHERE user_id = $1 for 1234
DEBUG express.example.app.users-path: query returned { rows: [ { id: 1, user_id: 1234, account: active, balance: 340 } ] }
Full Code Example
const express = require("express");
const { Quonfig } = require("@quonfig/node");

const quonfig = new Quonfig({
  apiKey: process.env.QUONFIG_API_KEY,
  defaultLogLevel: "warn",
});

const app = express();
const port = 3000;

// Mock database for the purposes of this example
const db = {
  run: (sql, params, callback) => {
    callback(null, []);
  },
};

const main = async () => {
  app.get("/users/:id", (req, res) => {
    const userId = req.params.id;
    // take the context from our url /users/123 and give it as context
    const context = { user: { key: userId } };

    // wrap our code in this context
    quonfig.inContext(context, (quonfig) => {
      const logger = quonfig.logger("express.example.app.users-path", "warn");

      logger.info(`getting results for ${userId}`);

      var sql = "SELECT * FROM table WHERE user_id = $1";

      // more detailed debug logging
      logger.debug(`running the following SQL ${sql} for ${userId}`);

      db.run(sql, [userId], function (err, rows) {
        logger.debug("query returned", { rows: rows });
        return res.send(`200 Okey-dokey`);
      });
    });
  });

  await quonfig.init();

  app.listen(port, () => {
    console.log(`Example app listening on port ${port}`);
  });
};

main();
To learn more about dynamic logging, check out the dynamic logging feature or check out the other things you can do in Node like feature flags.
Want to try it?
Quonfig stores your config in git. Feature flags, dynamic config, log levels, and secrets — all as files you own.